Friday, July 31, 2009

Duet 1.5 technical implementation overview

I will try not to enter into every detailed aspect of a Duet 1.5 technical implementation. However, if you are new to a Duet 1.5 landscape, you must always prepare very carefully all the pre-requisites outlined in the SAP Duet Guides (Admin and Master). The following components enter in action on a Duet 1.5 system:
  • SAP Duet 1.5 Server (based on Netweaver 7.0 Java - SP18 or higher).
  • SAP Duet 1.5 Business Applications (on top of Duet 1.5 Server).
  • SAP ECC 6.0, Portal 7.0, CRM 2007... on your SAP landscape depending of the Business Application you are going to deploy.
  • Microsoft Duet 1.5 Metadata Service - on Win2003 SP2.
  • Microsoft Duet 1.5 Request Handler Service - on Win2003 SP2.
  • Microsoft SQL Server 2005 SP3.
  • Microsoft Exchange 2003 or higher.
  • Microsoft Active Directory Service (ADS).
  • Microsoft Internet Information Services.
  • Client computers running on WinXP SP3 or higher, with Office 2003 Professional or higher.
  • Microsoft Duet 1.5 client running on top of client computers.
You can run the Microsoft Duet 1.5 Metadata Service and Request Handler on the same host. -- You can also run on this host the SAP Duet 1.5 services, however this can be isolated if your platform of choice for SAP is not Microsoft. For example: * SAP Duet 1.5 BA (based on Netweaver 7.0), runs on Solaris_SPARC / Oracle. * Microsoft Duet 1.5 MDS and RHS, runs on Windows 2003 / MSSQL. Roadmap for a successfull implementation:
  1. Read very carefully the SAP Duet 1.5 Master Guide, and Installation Guides.
  2. Decide if you are going to run SAP Duet and Microsoft Duet on differents hosts.
  3. Prepare the pre-requisites regarding the set-up of Exchange Server for Duet 1.5.
  4. Create an ADS user for Duet Request Handler communication, and follow up the activities outlined in the guide to configure the correct properties of this user.
  5. Create another ADS user for SAP Netweaver, (ex. j2ee-SID), and follow up the activities outlines in the guide to configure the correct properties of this user.
  6. Install the Microsoft Duet 1.5 Metadata Service and the Request Handler service. You will be asked to enter a MSSQL Server instance for the Metadata Service DB. This SQL Server instance can be remote or local. Also, you will be asked for the credentials of user created in step 4, during the Request Handler installation.
  7. Configure IIS websites accordingly as described on the installation guide.
  8. Install SAP Netweaver 7.0 SP18 (or higher).
  9. Install Duet 1.5 Core Server, Core Apps, Common, etc.. on top of Netweaver installation, using JSPM.
  10. Follow the configuration steps through your URL http://sapduethost:5nn00/duet/config. Here you indicate where is the location of your Metadata Service and Request Handler Service. You are also being asked here again for the credentials of the RH Service.
  11. Install Duet 1.5 Business Aplicattions through JSPM.
  12. Configure UME LDAP connection through the offline configtool, providing user/pass created in step 5. Before entering any data, you must upload a Kerberos 5 ADS readonly template compatible with your OS. This template can be downloaded from OSS note 994791.
  13. Check on Netweaver useradmin that you are able to search both UME database objects and LDAP users and groups.
  14. Run SPNego as described on the installation guide to enable SSO between the client user and SAP. http://sapduethost:5nn00/spnego. Check that you are able to resolve all SAMACCOUNTNAMES.
  15. Go to Visual Administrator and assign the spnego template created on previous step, to the OSP*TicketIssuer application.
  16. Logon on a client computer using an LDAP user/pass and enter the following URL: http://sapduethost:5nn00/osp/TicketIssuer. If you get in response a XML file, the SSO mechanism has been activated succesfully. However, you are prompted for user/pass when entering the URL, it might be due to diverse problems (communication with SAP <-> ADS, wrong configuration of SPNego...etc.). When you have no clue of what is causing the problem, you can use the DIAGTOOL to trace network and kerberos issues.
  17. Logon on the duet administration panel http://sapduethost:5nn00/duet, and set-up the systems connection related to the installed BAs. Test the connections and assign them your BAs.
  18. Go to your backend systems (ERP, CRM, etc..), and create the ABAP Duet technical roles through PFCG as described on the install guide.
  19. Go back to duet admin panel and follow up the activities outlined on the install guide to syncronize the ABAP Roles, with the Duet Java Roles.
  20. Prepare the technical pre-requisites of the backend systems (requiered SP level, RFCs, SSO2, certificates on both ABAP and Java systems, etc..).
  21. Once all the configuration is done on the SAP side we must now replicate all this information to the Metadata Service, Request Handler Service, and AzMan. Go to duet admin panel, and click on "Publish application metadata". It will take a while. Go to scheduled tasks tab, and check that all jobs are running correctly without warnings. Correct the errors if necessesary.
  22. Please note that the LDAP user ID must be the same as the SAP ABAP Backend user ID. If this is not the case, replication of roles to AzMan will not work correctly.
  23. Kindly ask your functional team to perform the Duet customizing on the backend systems, and on the duet applications. Once finished...
  24. Implement the Duet 1.5 client on the client computers. During installation you will be asked for the Microsoft Request Handler Server. Enter the information as the input from step 6.
  25. Set-up client Diagnostics on the SAP Duet 1.5 system.
  26. Open Outlook and check that the Duet 1.5 pane is showing correctly and the results are what expected from the functional side.
  27. ... and finally: Install Duet 1.5 client support tools on the client computers to troubleshoot any additional technical issue.
Please let me know if you encounter additional problems during this complex implementation process. I will be more that glad in assist you!

Thursday, July 30, 2009

Enable SAP Single Sign On - on Windows (Part I)

If you dont want to pay any additional third-party SSO solution for your SAP enviroment, you can already use some out of the box utilities since WebAS 6.20 and up, including the lastest releases.


Before implementing SSO on SAP / Windows, there are a few things you should know:

  • You requiere on your landscape, a Microsoft LDAP Server (Active Directory).
  • Your SAP system NT accounts (sidadm and SAPServiceSID), must be running under an already created LDAP domain.
  • If your Windows client computers are running on a different domain than the domain of where the SAP system NT accounts are (ex: PCs: clients.mycompany.org, SAP: servers.mycompany.org), you must create a trust relationship between these two domains.
  • Please note that the SAP kerberos implementation its in its way a little restrictive, so you must always provide the correct information (example: domains are always UPPERCASE).
Additional pre-requisite steps you need to follow to set-up SSO:

  • On the domain controller of the SAP server´s, execute:
SETSPN -A SAPServiceSID/dontcare MYDOMAIN\SAPServiceSID
(The Service Principal itself is not used, only the undocumented side-effect of re-enabling rfc-1964/rfc-4121 compliant authentication.)

  • Download the win32sso.zip or win64sso.zip (from OSS Note 352295) according to your platform. Unzip it and place the kerberos file on %SYSTEMROOT%\System32 (for ex. on x64 the file should be gx64krb5.dll).
  • Download and Install the SAPSSO.MSI, on each client PC on which you want to enable SSO. To get it, go to OSS Note 595341.

Enabling SSO on your SAP System server:

  • Create a system environment called "SNC_LIB" pointing to "C:\Windows\System32\gx64krb5.dll".
  • Set the following parameters on your instance profile:

snc/enable = 1
snc/gssapi_lib = C:\Windows\System32\gx64krb5.dll

snc/identity/as = p:SAPServiceSID@SERVERS.MYCOMPANY.ORG

  • Also set these additional parameters if you want to enable a fail-back mechanism in case the LDAP server is down (this will allow users to still log-on into the system by using their SAP username and password):
snc/accept_insecure_cpic = 1
snc/accept_insecure_rfc = 1
snc/permit_insecure_start = 1
  • Restart your SAP system and enter providing client, user and pass. If you are unable to logon, check the dev_w* traces to see what part of the SSO mechanism is failing.
  • Check on transaction SU01 that a new tab "SNC" is displayed.

Enabling SSO on your SAPGUI computers:

  • Install the before mentioned file SAPSSO.MSI. Also make sure that the variable SNC_LIB on these computers are created globally for all users (if not, change it).
  • Right click on your SAPLogon connection --> Properties --> and flag "Enable SNC", below enter the following: "p:SAPServiceSID@SERVERS.MYCOMPANY.ORG".

Linking LDAP users with SAP users:

  • Log on your SAP system and go to transaction SU01. In this example SAP User ID is "WAYNE", while its LDAP User ID is "jwayne".
  • Select SNC tab, and provide the following information: "p:jwayne@CLIENTS.MYCOMPANY.ORG". Intro to validate the SNC entry and you should see a green message "SNC Canonical Name determined".

Now the LDAP user ID "jwayne" is able to logon to the SAP system under user ID "WAYNE".
Please note, you have to set the user SNC properties for each mandt you want to enable SSO.


Next post will deal with the SSO setup mechanism between a non-SAP Microsoft plataform (UNIX) and a Microsoft LDAP Server.

Wednesday, July 29, 2009

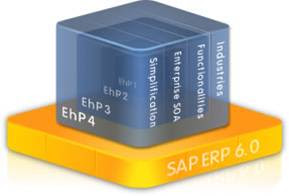
Installation/Upgrade of SAP ECC 6.0 Enhacement Package 4 (EhP4) using SAINT

With the SAP release strategy of EhP4, there is a new mandatory tool to perform the installation/upgrade of ECC 600 ro release 604, and Netweaver components 700 to 701 (EhP1). SAPehpi (Enhacement Package Installer), acts as the SAPup tool we all know that performs upgrades from different releases. The traditional method of installation/upgrade before EhP4 was the stantard tool SAINT.


I have different projects on which the use of SAPehpi is a plus (for example on the Production landscape), but was a drawback on Dev and Test systems. Why?
As any upgrade project you might work in, you will find that:
  • You might need to set-up a shadow instance to overcome downtime.
  • For this shadow instance you will need adittional resources...
  • ...Double space for DB allocation.
  • ...More RAM and CPU might be needed.
Additionally, most customers are entitled and enforced to use SAP Solution Manager for the installation of EhP4. These customers also might run on a limited storage or resource allocation, so the EHPI tool is not an option for them on their Dev and Test systems.

If you want to perform a traditional Add-On upgrade using SAINT on your systems, oficially, you will be able to do it only on 32-bit platforms. However, most of the new systems are running now on 64-bit. If you want to perform the installation on this plataform read the following guide. Please keep in mind that this procedure is not officially supported by SAP.
  • First thing to check is your SPAM/SAINT level. You will find that if you use level 34 or up you wont be able to use the tool for EHP4, as it will say that you must use EHPI to perform the installation. Level 32 and below are not handling correctly the queue for this installation and thus will not work. You need to use SPAM/SAINT level 33. There are different notes in the SAP Service Marketplace which deals with the reinstallation of a SPAM package (in case you are in level 34 or up).
  • Download all the EhP4 Add-Ons upgrades, and Netweaver EhP1 Add-Ons upgrades (you might find them already packed on distributed DVDs). Also it is highly recommended that you download the lastest Support Packages for these Add-Ons.
  • Proceed to unpack all the .SAR and .CAR files if necessesary and locate them in the EPS/in directory.
  • Shutdown the system and upgrade your kernel to the last level of release 701. Restart it and check on the dev_w* files that the release 701 is showing up.
  • Proceed to define the SAINT queue with the already downloaded EHP4 (plus NW EHP1). If you find that during the queue calculation, a newer SPAM/SAINT level is needed, remove the conflicting component from the queue and start the installation (remember to adjust accordingly the parallel R3trans and Background processes on SAINT options, based on your system resources -- to speed up processing).
  • After the installation has finished, upgrade SPAM/SAINT to the last level, and perform the installation of the packages you took out of the queue in the previous step.
  • You must also run into all the processes involved in a Add-On upgrade or Support Package implementation (Locked Requests, SPDD/SPAU check, etc..).
  • Its a good idea thereafter to schedule SGEN as the system has been rebuilt completly.